If you've purchasing or thinking of purchasing a Tesla, then get yourself a USB stick to activate the Tesla Dashcam function
How to set Up the Tesla Dashcam...
Not many people know that with the most recent updates of the firmware, you can use your Tesla’s built in cameras as dashcams. But unlike Tesla, this isn’t an easy process to get it set up.
So we’re going to use our guide below and help you get started with this safety feature. You will need the following:
- USB Drive – No more than 32gb
- Windows/Mac to format the drive
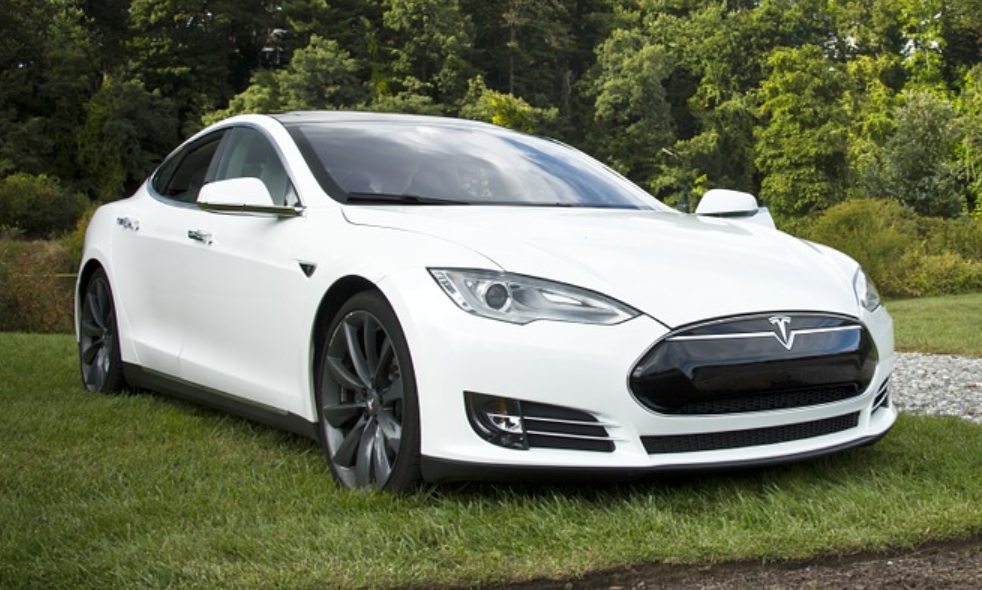
- A Tesla Model 3, S or X
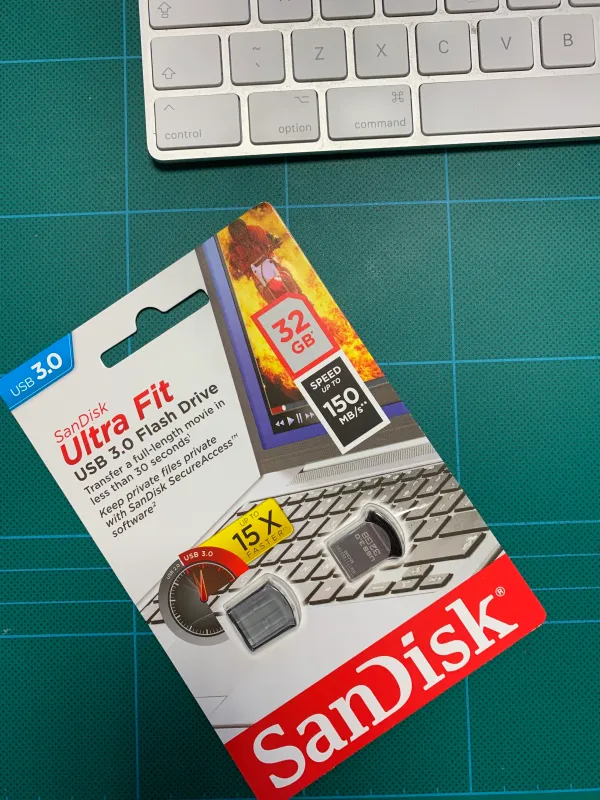
- Before purchasing a USB drive, think hard about the model you want to go for. Don’t buy cheap, the Tesla continually reads and writes to the drive so quality is extremely important. I’d highly recommend the SanDisk Ultra Fit 3.0 Flash Drives. Not only are they durable but they are small and don’t stick out of the Tesla’s USB stick too far.
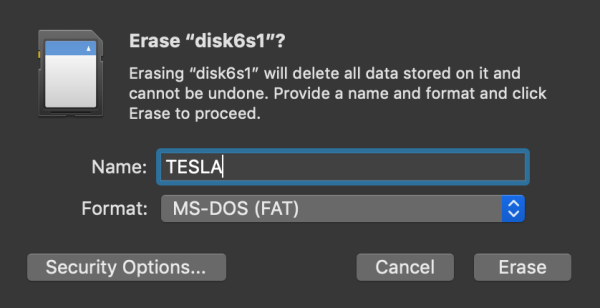
2. You now need to format the USB drive so that the Tesla can read and write, you will need your Windows PC or a Mac to do this. Use Disk Management in Windows, or right click on the drive and click Format. On Windows PC you will need to format the USB drive as FAT32.
If you are a Mac User then you need to use Disk Utility and format the drive (erase) as MS-DOS (FAT).
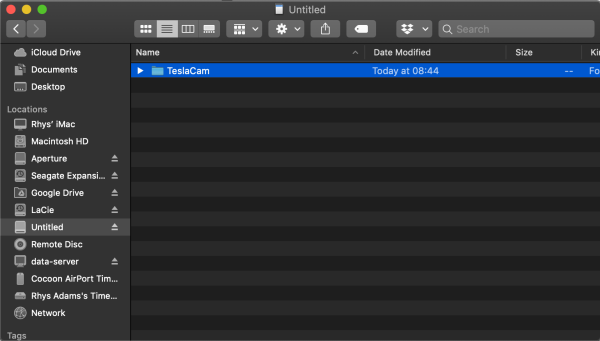
3. After the drive is formatted, don’t eject it just yet. Go into the drive and create a new root-level folder, this needs to be named: TeslaCam – Make sure you copy the case so that it matches mine above.
4. Now all you need to do is insert the USB drive into either of the front USB ports in your Tesla Model 3, S or X.
5. When the car is on, wait a few minutes. The Tesla initialises the drive, you will know when this works as a little camera icon with a red dot will appear at the top of the screen to show that it is recording.
THATS IT! ALL READY
Using the Tesla Dashcam
Once the Tesla Dashcam icon appears at the top of the screen with the red dot, the Tesla system is recording your footage.
If you need to download the footage then just tap the icon and the icon changes to show that it has downloaded the clip. Each clip will be 60 seconds long, so longer clips may split.
You can use something like iMovie on iOS or your Mac to merge the clips together, if required.
Once the clip has finished the icon reappears with a green tick.
To turn off the Tesla Dashcam, just hold down on the icon for a few seconds until the camera burst out flares. The icon will switch from a camera with a X on it, this shows that the camera is no longer recording. Ideal if the camera may record you somewhere, you shouldn’t be!
Remember! The system will only initiate when a correctly formatted USB drive is set up, so make sure you follow the instructions.
Disclaimer
This article has been written by ourselves and we have not been paid to write or mention any of the companies within this blog post. But if you click on some of the links within this website, we may receive a small commission.
Photo provided by Pixabay – Click Link for Details.